It has been a number of years since I last made soy milk. But after trying to make tofu from the shop bought variety - which didn't work! Anyway, I counted my loses and decided it was time to just do it all from scratch.
 |
| All rights to images reserved copyrights Alicia Lewis @ KitchenTakeovers |
Things I have learnt about making soy milk
- A little goes a long way with soy beans
- Fresh soy milk will last for about 4 days max in the fridge
- Regardless how big your saucepan, it most likely will boil over!
- You need to keep a sharp eye on the boiling process
- It takes time, not a rush job
- The process is rewarding and the milk fresh and delicious
- Amazing value for money!!!
Making soy milk is rewarding but time consuming so put an hour or so aside to do this. And whilst your at it, just do enough to last 3-4 days. Lack of preservatives mean it won't last long!
Ingredients
makes 2 pints
- 1 cup dried soy bean
- 3 cups of water for soaking
- 7 - 8 cups extra filtered or bottled water for boiling
#As with all recipes on this blog unless otherwise stated they are my own; be kind enough to, link back to original, make, share and highlight - happy sharing #
Preparation
Wash and soak the soy beans in the 3 cups of water over night. They will get plump and take on a slightly yellow beige colour.
 |
| All rights to images reserved copyrights Alicia Lewis @ KitchenTakeovers |
Drain and rinse the beans well
 |
| All rights to images reserved copyrights Alicia Lewis @ KitchenTakeovers |
Put them in a blender with just enough water to cover them, blend at high speed to a smooth paste, you may need to stop the blender throughout and scrap down any rough bits so everything gets blended well.
 |
| All rights to images reserved copyrights Alicia Lewis @ KitchenTakeovers |
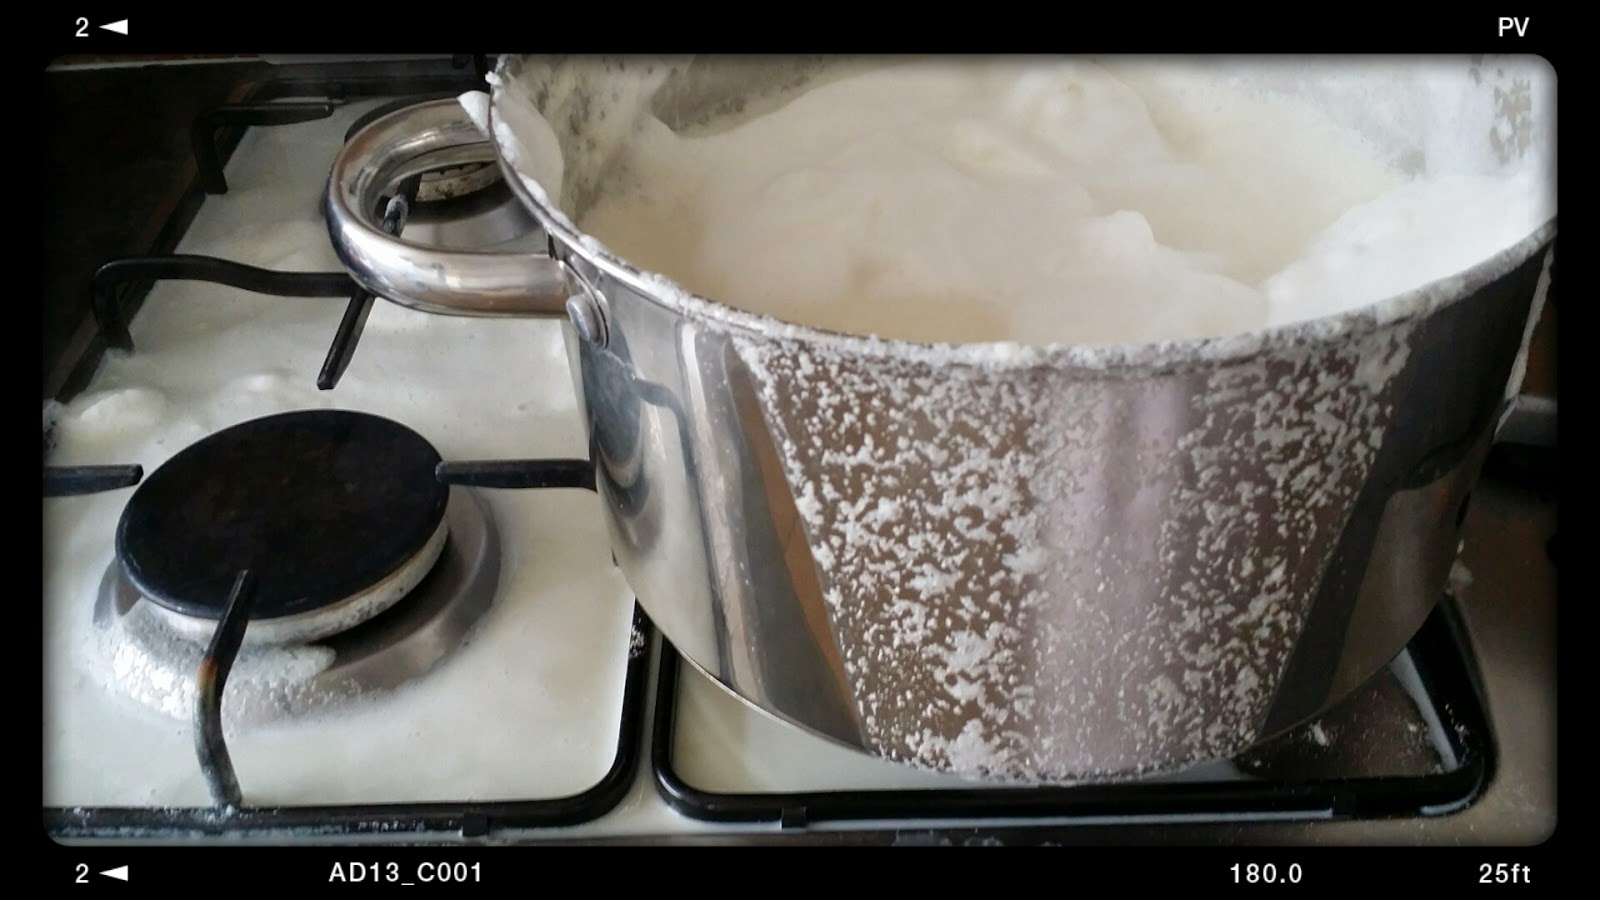
Transfer the soy bean paste to a large sauce pan with the 7 cups of water, boil for 20-25 minutes. Keeping a sharp eye on this stage, as it foams a lot and will boil over!!
 |
| All rights to images reserved copyrights Alicia Lewis @ KitchenTakeovers |
I put a wooden spoon across the pan and continue to stir the mixture making sure it didn't boil over again, or I wouldn't be left with anything in the pan except foam.
 |
| All rights to images reserved copyrights Alicia Lewis @ KitchenTakeovers |
You want to be gently with the stirring, do figure 8 type motions, and if the wooden spoon across the pan doesn't work, just sprinkle some cold water in the pan as the foam threatens to go over the edge.
 |
| All rights to images reserved copyrights Alicia Lewis @ KitchenTakeovers |
The longer this cooks, larger bubbles and dense foam forms.
 |
| All rights to images reserved copyrights Alicia Lewis @ KitchenTakeovers |
After 20 minutes or so your soy milk should look something like this, and the foaming should be pretty much gone.
 |
| All rights to images reserved copyrights Alicia Lewis @ KitchenTakeovers |
Get your colander or strainer, clean bowl large enough to hold the liquid and a cheese cloth or clean tea towel. Set-up your straining station like above. And ladle the mixture gently into the bowl through the cheese cloth.
 |
| All rights to images reserved copyrights Alicia Lewis @ KitchenTakeovers |
And, we have an empty pot and a mucky stove top to clean up!
 |
| All rights to images reserved copyrights Alicia Lewis @ KitchenTakeovers |
Be very careful with this step, gently and carefully remove the colander whilst holding the cheese cloth securely to keep the soy pulp from getting into the liquid.
 |
| All rights to images reserved copyrights Alicia Lewis @ KitchenTakeovers |
wrap and squeeze the cheese cloth over the liquid with a pair of salad tongues or anything that'll keep your hand from getting burnt!!!
 |
| All rights to images reserved copyrights Alicia Lewis @ KitchenTakeovers |
Leave the liquid to cool, once this has cooled get your clean jar or whatever container you are using to hold your soy milk (juice) and pour it in.
Done!
Ladies and gentle folk you are now the proud owner of diy soy milk.
#Toptip: you can leave it as it is or add some agave syrup for sweetness, use it for your cereal, soups, shakes and bakes but NOT tea or coffee it might curdle.
 |
| All rights to images reserved copyrights Alicia Lewis @ KitchenTakeovers |
Don't get any big ideas about throwing away this pulp! we are going to use it later...just leave it to cool and save it in a container in the freezer or fridge.
Click the link if you haven't seen me on BBC talking about food
Bon Appétit!!
 |
| All rights to images reserved copyrights Alicia Lewis @ KitchenTakeovers |
Till next time, EAT mindfully, DRINK responsibly, and EXERCISE your mind and body!!!
***Disclaimer: Any of the information within this blog post and others on this site is for information and educational purposes only and is NOT intended to be taken as diagnosis, treatment, cure or to prevent any disease. Any reader concerned about his or her health is advised to seek medical advice from their GP or relevant medical professional***
Labels: 5 Ingredients Challenge, dairy free, Health Bites, Recipe List, Vegan, Vegetarian